Announcements
Welcome to Servikus Tutorials Area! You will find a ton of useful tutorials in our tutorial area. We hope that you will find them useful! If you want custom tutorial created, please let us know and we will create it for you!
-
Advanced tutorials
Tutorials aimed for advanced users and, mostly, Dedicated Servers owners.
-
Basic tutorials
-
cPanel
cPanel related tutorials
-
Domain tutorials
-
WordPress
WordPress related (installation, plugins, tips etc)
How to organize WordPress pages
Posted on 08/09/2014 by Bojan Njamcić
If you remember from our previous tutorials about posts in WordPress, we organized them with tags and categories. Well, we don’t have those things when we work with pages. But if you remember we organized our categories with child-parent relations. And that works the same way with pages.
We can set every page to be a child or parent of a certain page. This helps a lot when we deal with a big number of pages on our blog. All of these relations will also affect the way our pages are displayed in our main menu, and also the URL structure of our pages will be affected by parent-child relations between our pages. Anyhow, WordPress made a lot of things very easy for us, and organizing pages is not an exception to that.
Note: In this tutorial we assume that you are already logged into your WordPress admin area.
Step 1: For our first step we are going to create a new page called: “Parent page“, and then we are going to create another page called: “Child Page“. Just to mention that this tutorial is done on a fresh installation of WordPress, so we are going to have sample post and sample page also. In our last tutorial we learned how to create a new page so I will just skip the how to create part and go right to organizing our page structure.
Step 2: I created 2 pages as I said above. I didn’t set any relation between them. You can see how that looks on a picture below:
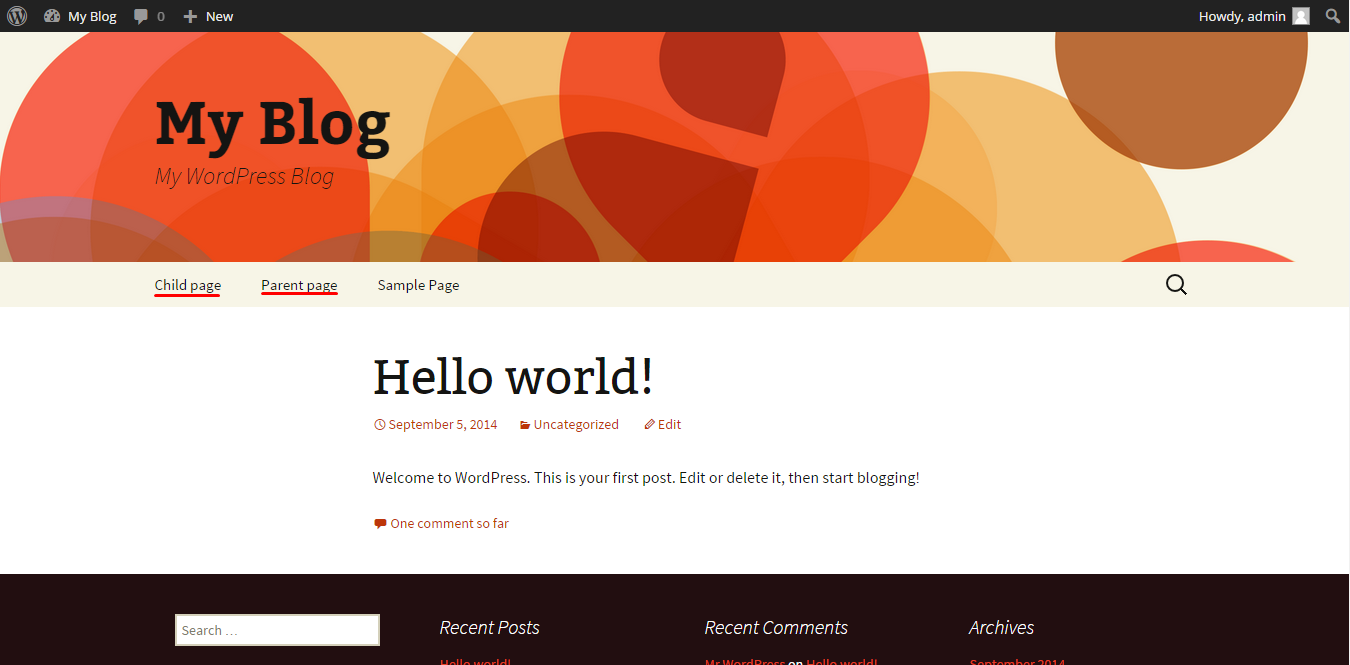
As you can see we just have sample page and two newly created pages lined up one next to the other on our main menu. We don’t like that, and now we want to organize that a little bit.
Step 3: There is more than one way to add parent-child relation between pages, I’ll show you my favorite way in this tutorial. We need to navigate to “Pages –> All pages“. We will see a window like on a picture below:
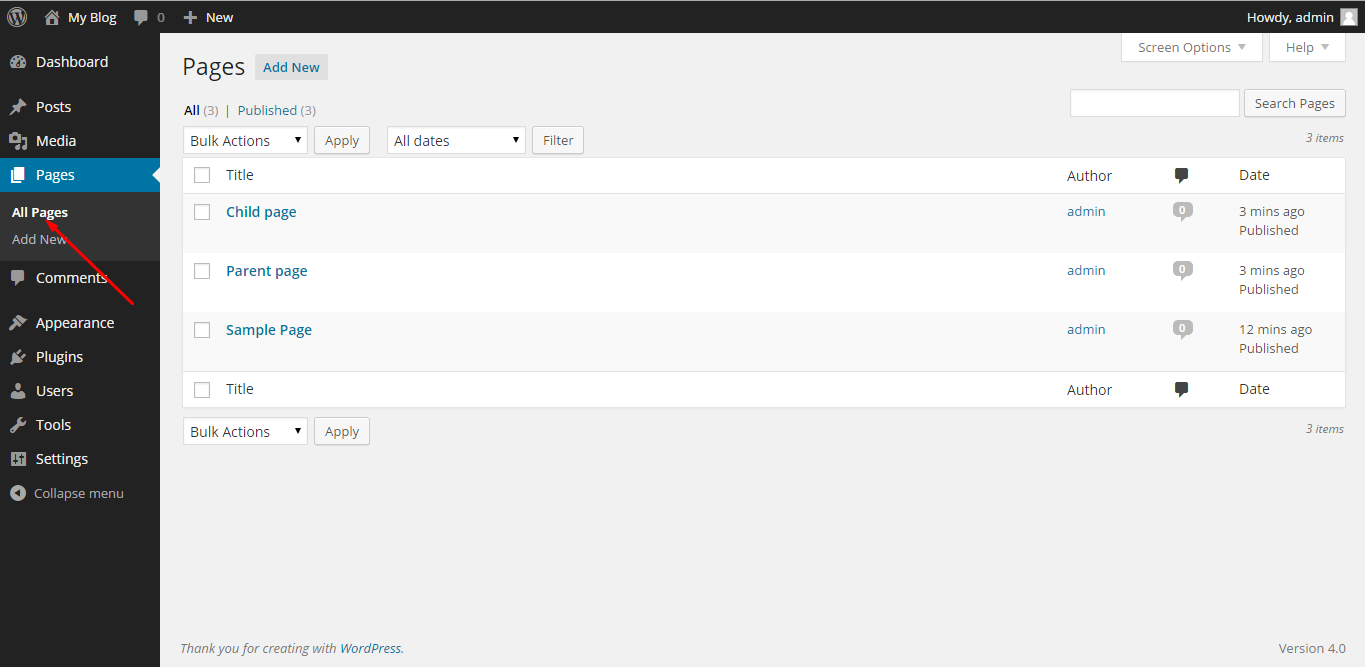
Step 4: Now when we hover over a certain page in this window a couple editing options will appear. We want to edit our “Child page” and make it a child of a “Parent page“. So we hover over “Child page” and click on “Quick Edit“. Once we did that we will new editing options for page we selected, like shown on picture below:
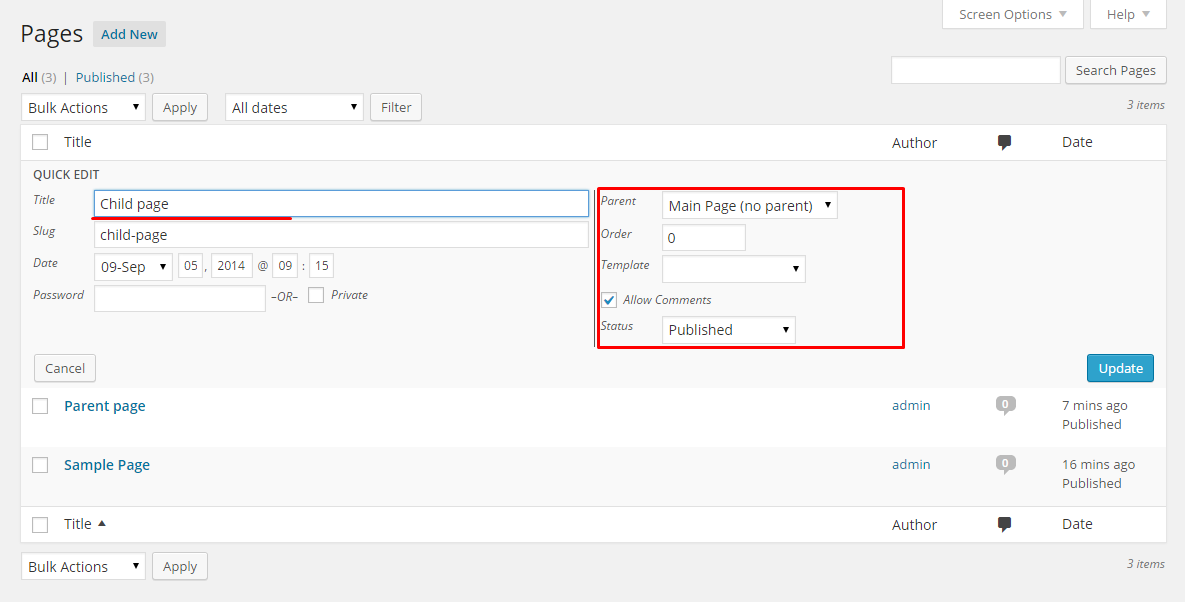
Step 5: Now we want to set parent-child relation, as I said above. We want to make “Child Page” to be a child of a “Parent Page“. We can do that by clicking on drop-down “Parent” menu.
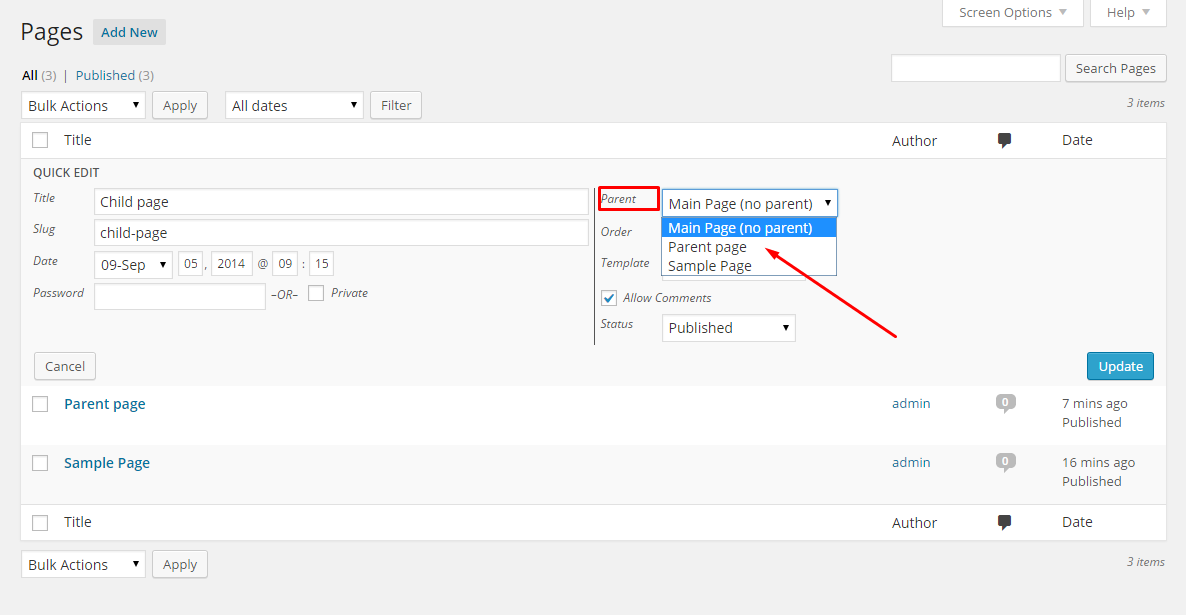
Step 6: From the drop-down menu we select “Parent Page” (whatever page you want to be a parent of a page you’re editing at that moment) and click on “Update” button. And that’s it. We just created a basis structure for our WordPress pages. You can see how our main menu looks on a picture below:
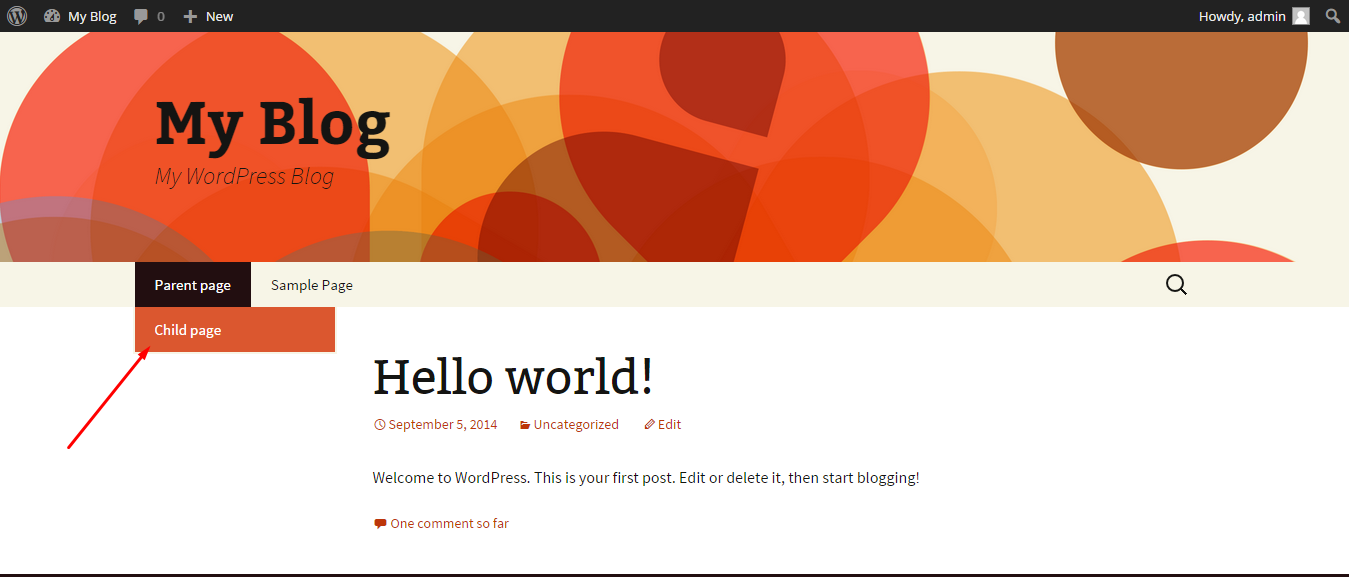
As you can see now when we hover over “Parent Page” on our main, we will see a drop-down list with our “Child Page” in it.
Another way to add structure and organize our pages is selecting a parent page when we add a new page. Look at picture below:
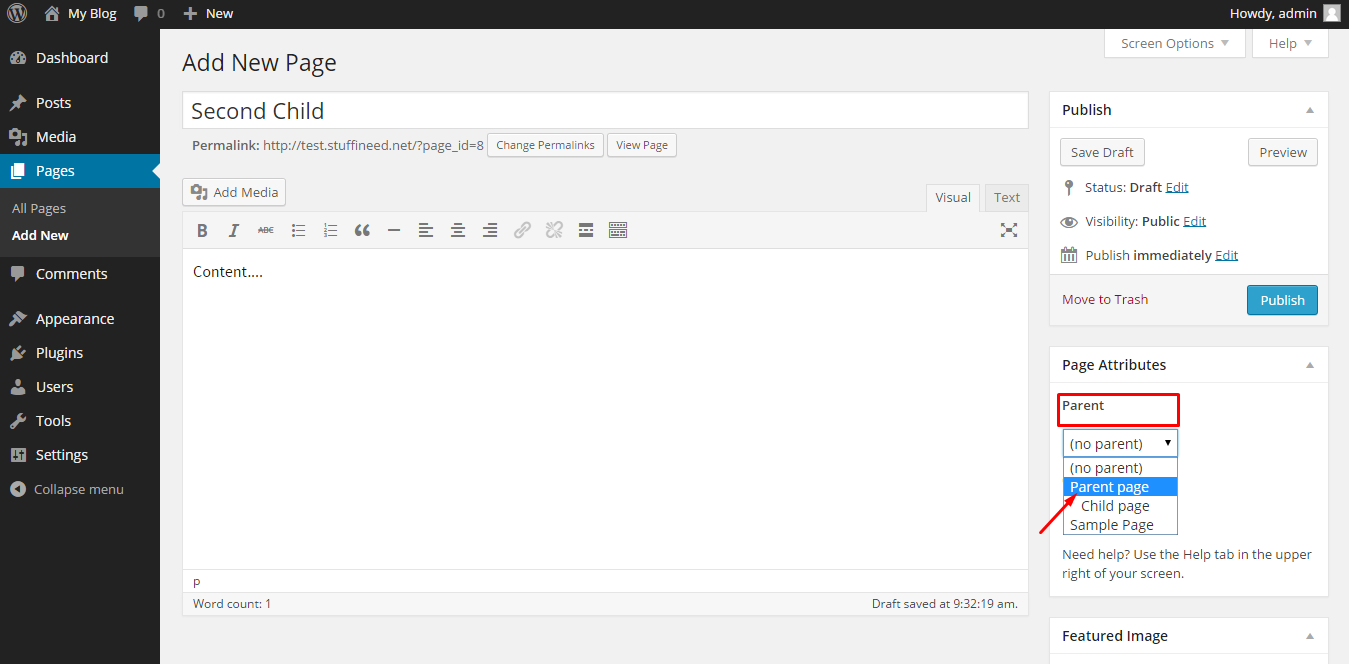
This way might be easier to some of you, I prefer editing this relations from “All pages” window simply because I have an overview of all pages and their relations. Again it is all just a matter of your personal preference.

============================================================================