Announcements
Welcome to Servikus Tutorials Area! You will find a ton of useful tutorials in our tutorial area. We hope that you will find them useful! If you want custom tutorial created, please let us know and we will create it for you!
-
Advanced tutorials
Tutorials aimed for advanced users and, mostly, Dedicated Servers owners.
-
Basic tutorials
-
cPanel
cPanel related tutorials
-
Domain tutorials
-
WordPress
WordPress related (installation, plugins, tips etc)
Managing DNS records in Zone Editor (cPanel)
Posted on 08/01/2022 by Nevena Markovic
The DNS records are there to ensure that the authoritative DNS servers receive the needed info about the website, like domain name, IP address, and details on how to handle requests for your domain (TTL aka time-to-live and similar stuff). In that way, your website finds its way to the Internet, and others can find their way to visit it once they type your domain name.
Therefore, we need to update or add new DNS records from time to time. Where you change your DNS records depends on your nameservers. If you are using your hosting providers’ nameservers, here is a way to manage your DNS records in cPanel.
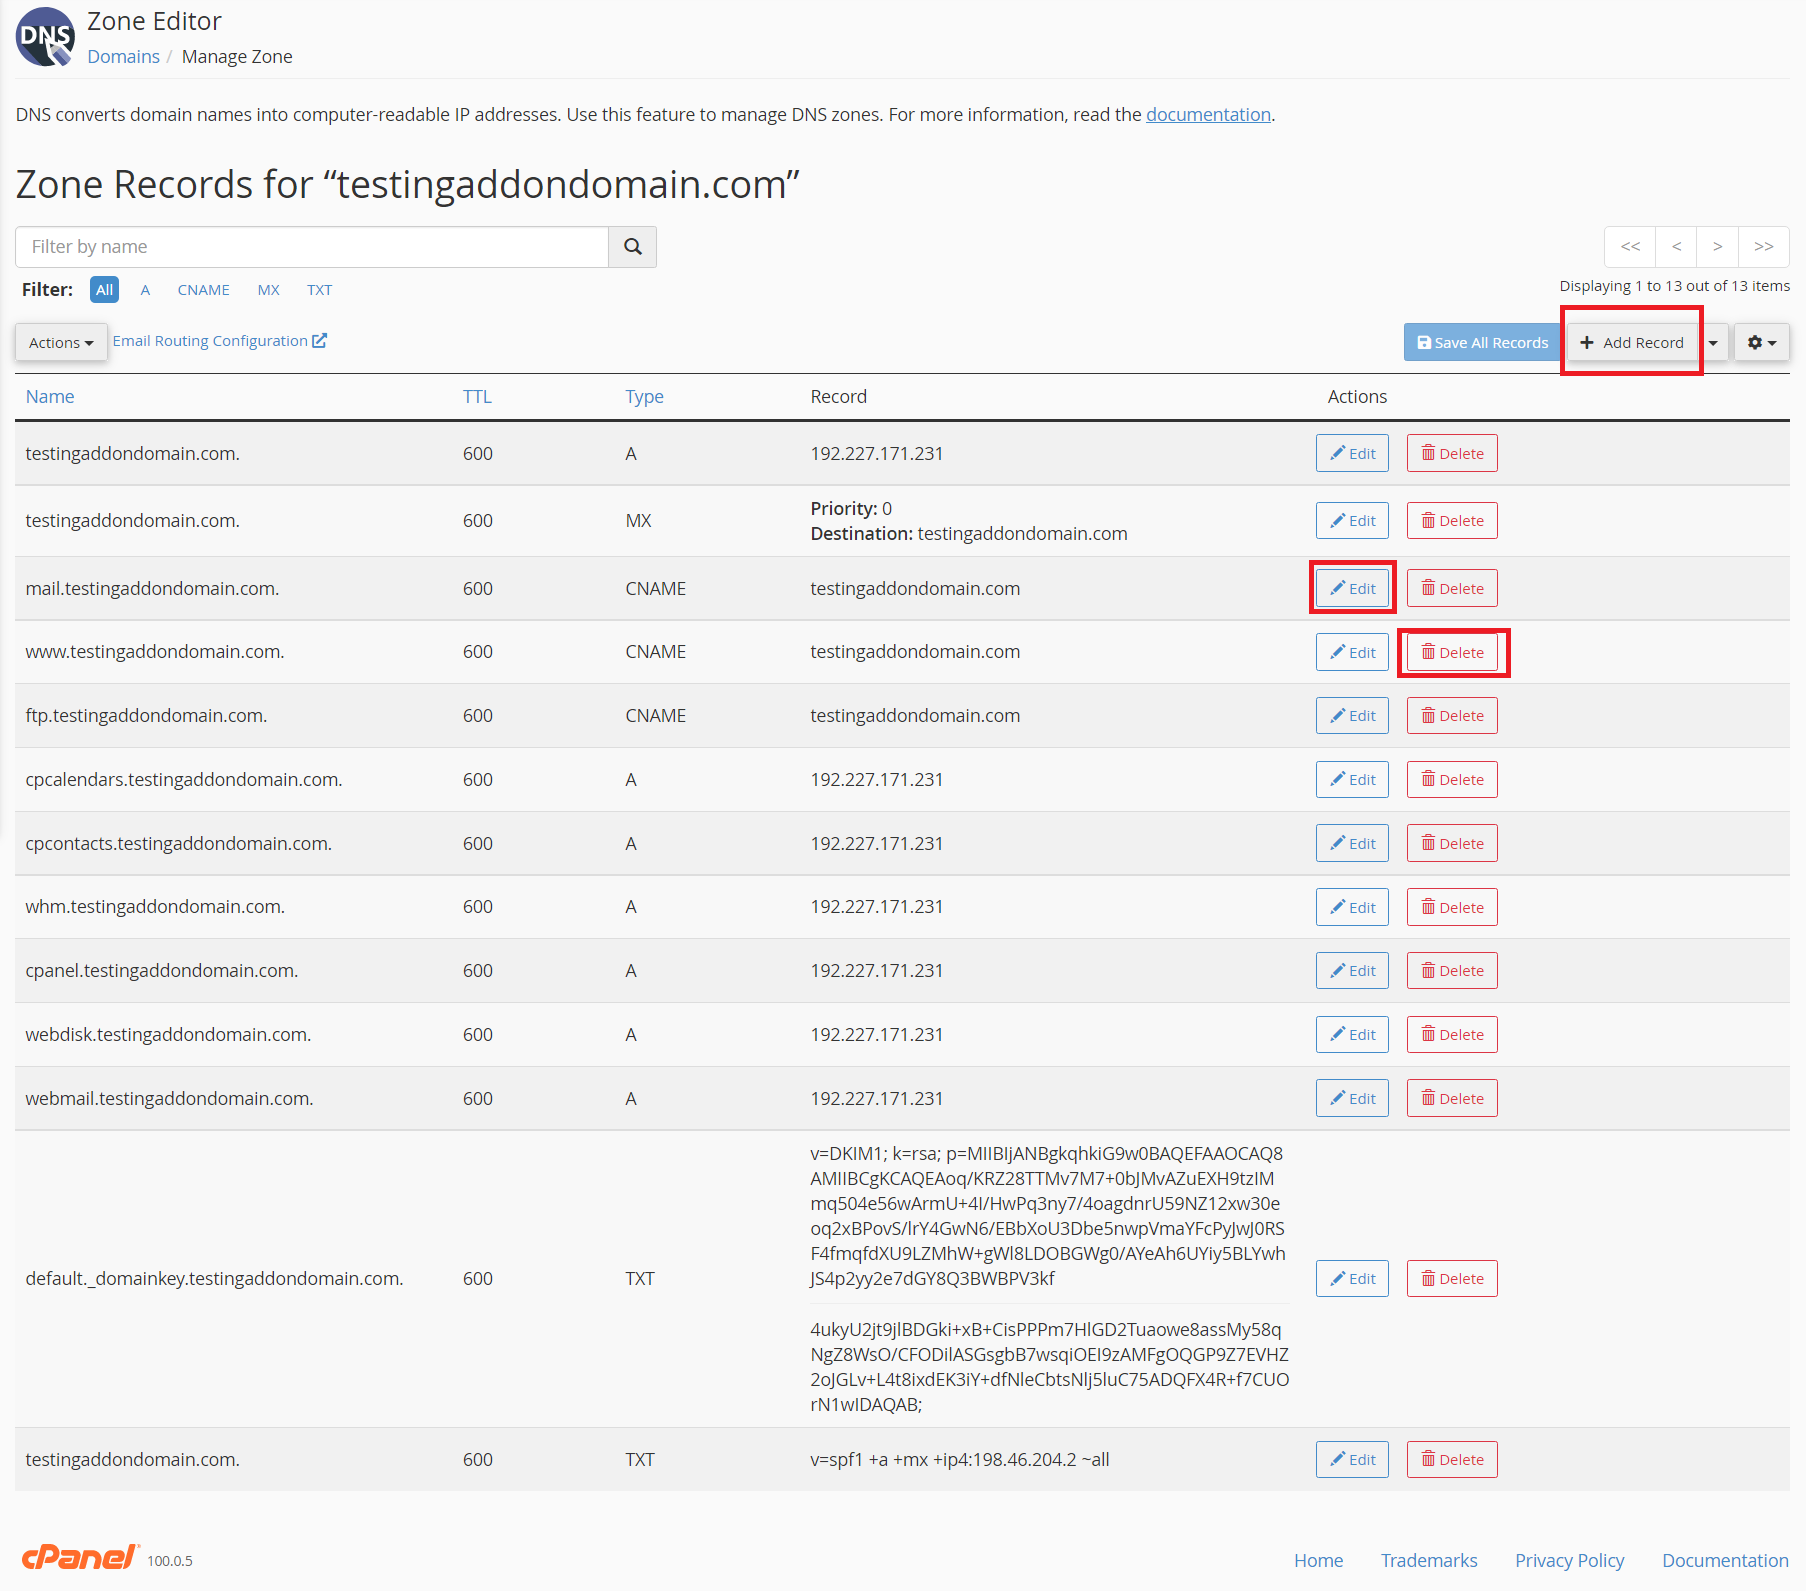
Find a section in cPanel called DOMAINS and click on the Zone Editor.

Next, locate the domain you wish to add/remove/change DNS records and click Manage. You can use the search bar to find domains faster if you have many domains on your account.

The list of your DNS records will look like in the following picture most of the time. There are a few things you can do with the records:
Add record – Use this option to create a new DNS record;
Edit – Use this option if you wish to change the existing DNS record;
Delete – Use this option to remove an existing DNS record.
Note: Do not erase or modify DNS records if there is no specific need to do so.
Adding a TXT record in the cPanel’s Zone Editor
(example – Google verification token)
One of the ways to verify your website ownership for Google Search Console is to add a TXT record. A video from Google shows you how to get the TXT record you need to add for your domain name property. Usually, you will need to add the record on your domain provider’s admin page, as they say in the video.
However, if you use Servikus hosting and have our nameservers, you need to add the TXT record via Zone Editor in your cPanel.
In the upcoming tutorials, we will write more about adding a TXT record on the Cloudflare account (for those of you using their nameservers).
To add a new TXT record, do the following:
1. Click Add record (see the previous picture);
2. Type your domain and put the dot on end (without it, the record will not be valid);
3. Choose TXT from the drop-down menu.

4. Add the value you have received from your Google Search Console (Google verification token)
5. Click Save Record.

You can add any of the records following similar steps. Make sure that you select the proper Type of record. Also, double-check if you have entered all the values correctly, as each symbol makes a big difference in DNS records interpretation. In other words, if you have a typo – the record won’t work.

============================================================================
Pingback: Servikus Tutorials » How to Set Up Your Domain for Google Workspace Email on Servikus Hosting