Announcements
Welcome to Servikus Tutorials Area! You will find a ton of useful tutorials in our tutorial area. We hope that you will find them useful! If you want custom tutorial created, please let us know and we will create it for you!
-
Advanced tutorials
Tutorials aimed for advanced users and, mostly, Dedicated Servers owners.
-
Basic tutorials
-
cPanel
cPanel related tutorials
-
Domain tutorials
-
WordPress
WordPress related (installation, plugins, tips etc)
How to install new WordPress plugins manually
Posted on 08/09/2014 by Bojan Njamcić
In our previous tutorial we learned how to install a plugin from the WordPress plugins directory. But sometimes it happens that the plugin we need can’t be found in WordPress plugins directory (this is the case, for example, with paid plugins). What we need to do in that case is to upload our plugin manually.
Again, there are more ways to this. We can upload plugin to our plugins directory via FTP or our host’s file manager. But what I found for new user to be easiest is to upload plugins with the help of “Upload Plugin” option. So, in this WordPress tutorial I will show you how to use “Upload Plugin” option to easily add new WordPress plugins.
Step 1: Log into WordPress admin area for your website.
Step 2: Navigate to “Plugins –> Add New” page.
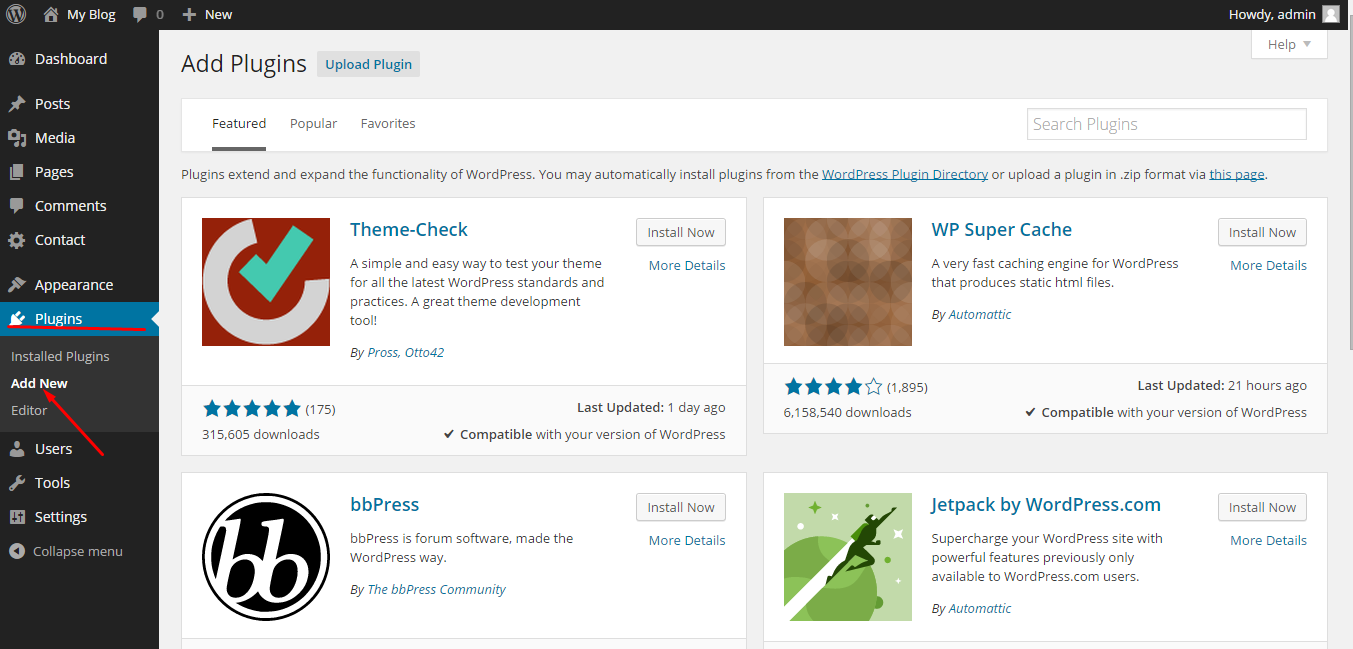
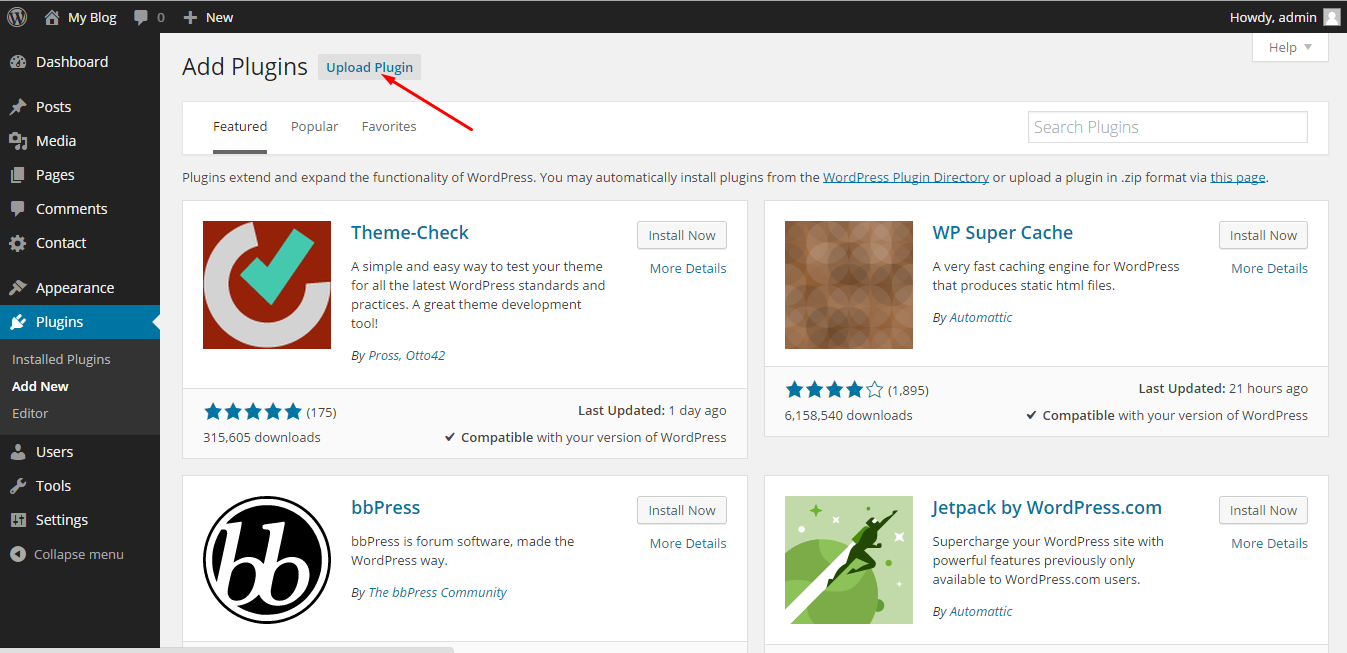
Step 3: Click on “Upload Plugin“, as shown on picture below.
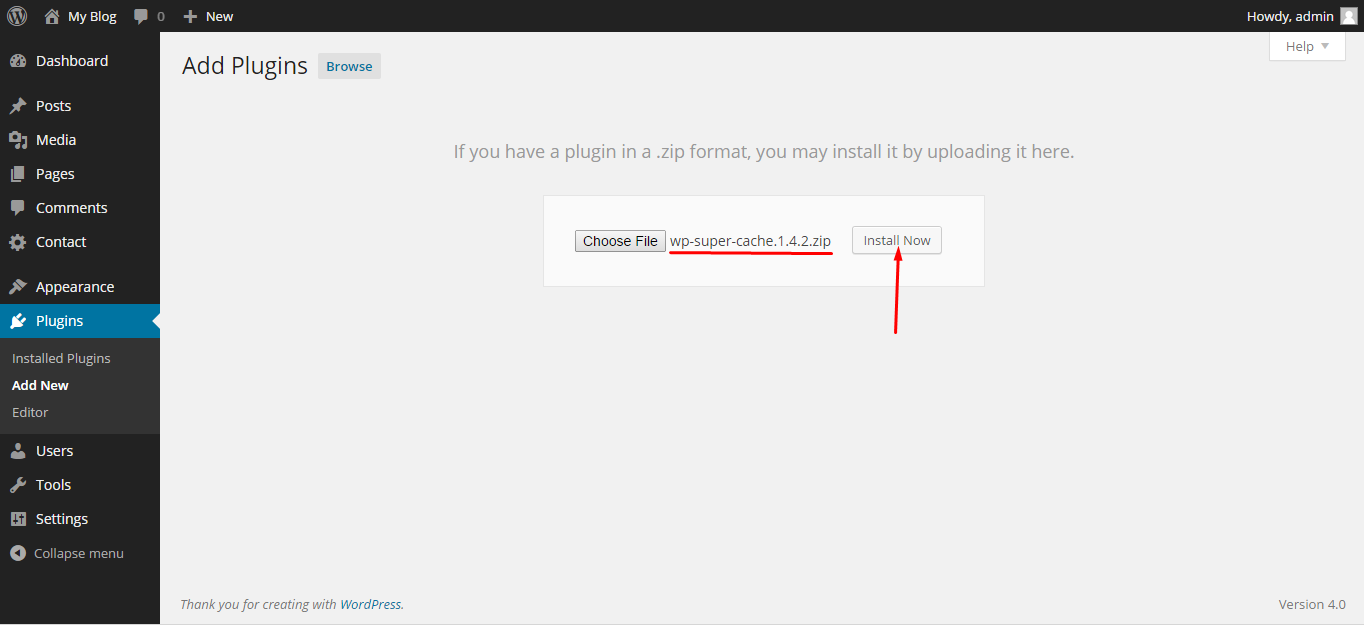
Step 4: Click on “Choose file“, then browse through your hard drive and find desired plugin. Once you selected desired plugin for this installation you need to click on “Install Now” button. For the sake of this tutorial I downloaded WP Super Cache plugin.
Note: Your plugin must be in a .zip format in order for this to work.
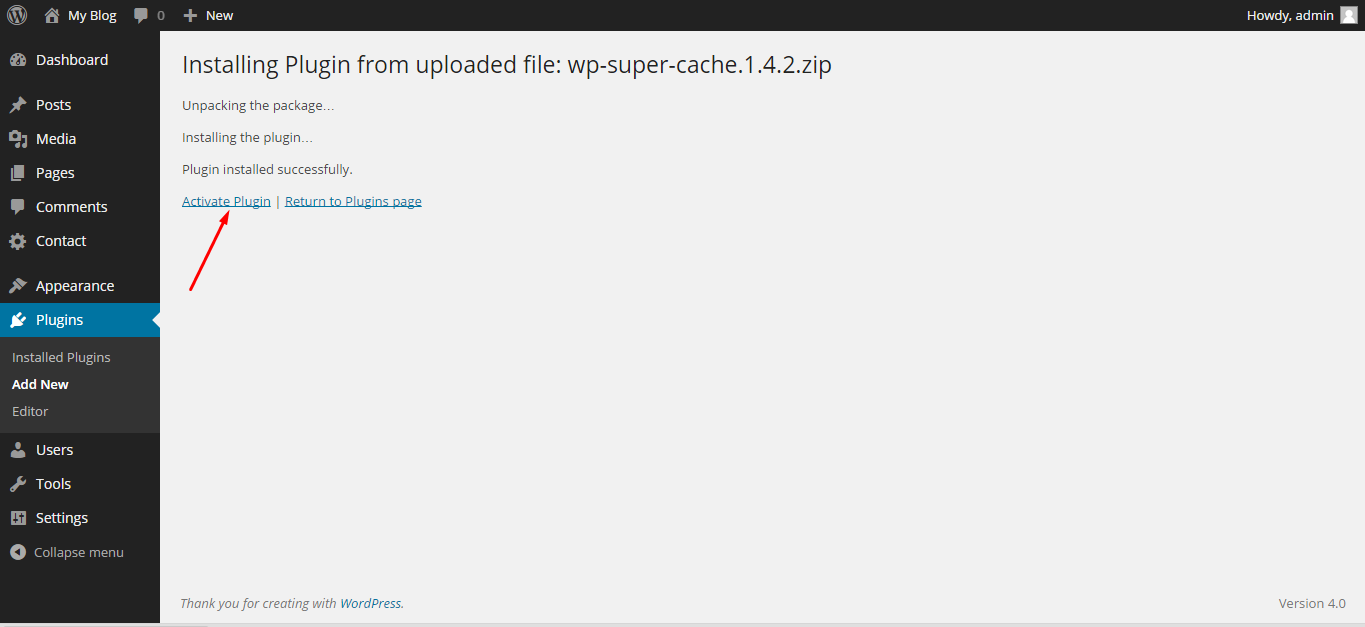
Step 5: Once the installation is completed you will be redirected to “Plugin installed successfully.” page. And now all there is left to do is activating your new plugin. Just click on “Activate plugin” and it’s done.
That would be all for this tutorial. Now we learned how to install WordPress plugins manually.

============================================================================