Announcements
Welcome to Servikus Tutorials Area! You will find a ton of useful tutorials in our tutorial area. We hope that you will find them useful! If you want custom tutorial created, please let us know and we will create it for you!
-
Advanced tutorials
Tutorials aimed for advanced users and, mostly, Dedicated Servers owners.
-
Basic tutorials
-
cPanel
cPanel related tutorials
-
Domain tutorials
-
WordPress
WordPress related (installation, plugins, tips etc)
How to change nameservers (NS) for your domain
Posted on 06/07/2014 by Zoran A.
As you may already know, when you receive from us mail with login details that is the time when you need to change your nameservers to point to our server in order for your site to be visible to the World. This is done in similar ways on different internet domain registrars. We will show you how to change NS on few of them.
GoDaddy
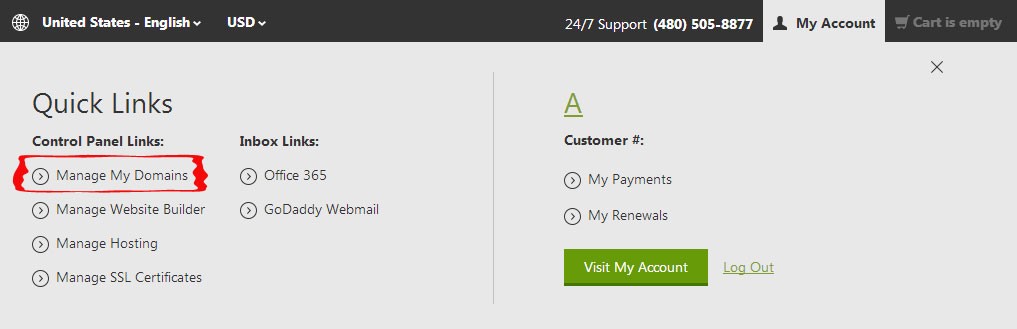
Very popular internet domain registrar. When you log in go to My Account → Manage my domains:
From there you just click on the drop-down menu next to your domain name and click on Set Nameservers:

Now you have to select Custom (if it’s not already selected) and click on Edit Nameservers:
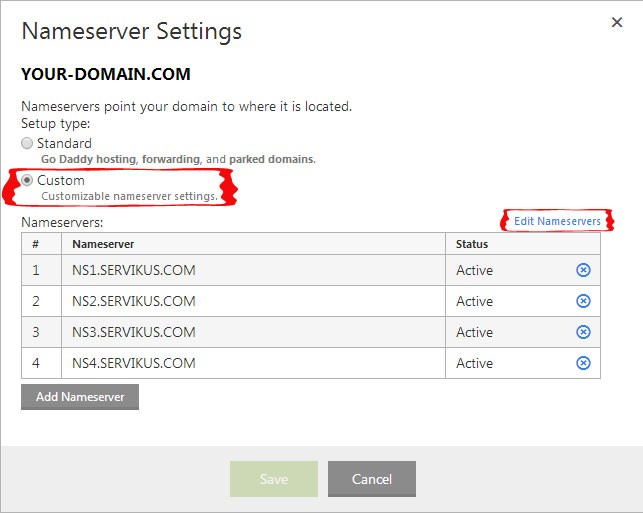
All you have to do now is to enter our Nameservers:
- NS1.SERVIKUS.COM
- NS2.SERVIKUS.COM
- NS3.SERVIKUS.COM
- NS4.SERVIKUS.COM
As this screenshot shows:
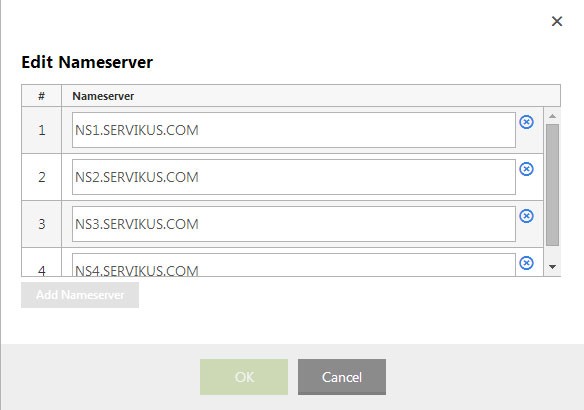
Ok, Save and you’re done.
Namecheap
In order to change the nameservers for your domain please do the following:
- Sign in to your Namecheap account
- Click on your username – it will be on the black bar located at the top of the page
- Go to Manage Domains
- Click on the domain you would like to edit
- Click on Transfer DNS to Webhost (or Domain Name Server Setup) to setup the nameservers for your domain
- Select Specify Custom DNS Servers (Your own DNS Servers) option and enter the nameservers accordingly
- Click Save changes

Note that it may take up to 24-48 hours for the changes to take effect worldwide.
Name.com
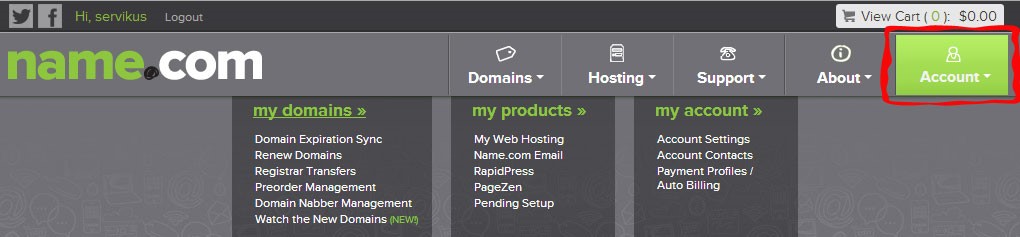
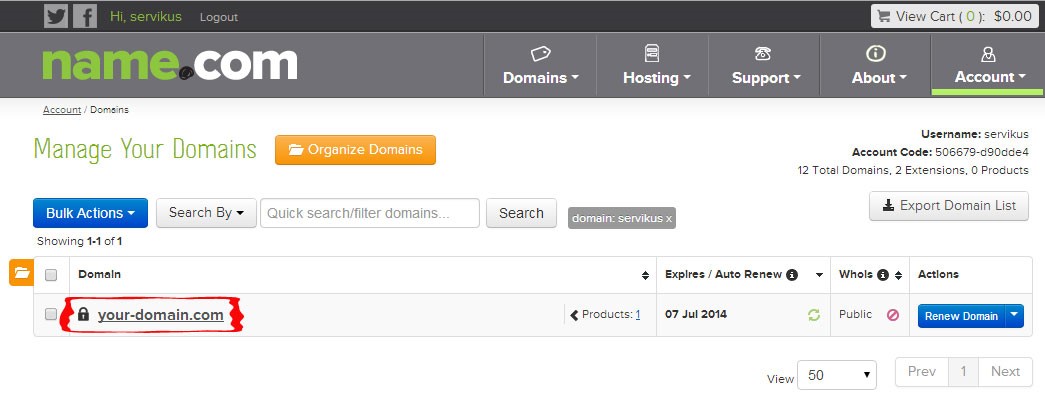
- Log in into your Name.com account and click the Account button on the top of the page and then my domains from drop-down menu.
- Select the domain you wish to update with a click.
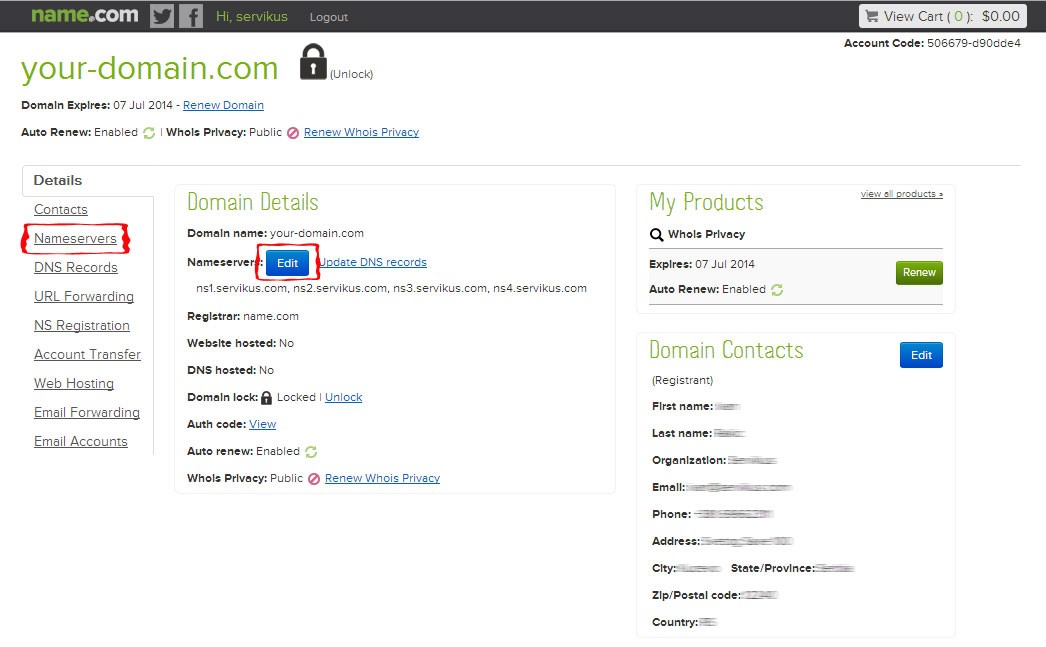
- On the Domain Management Page click on Nameservers and then you will see Name Servers on the left with an edit link next to it, click this link.
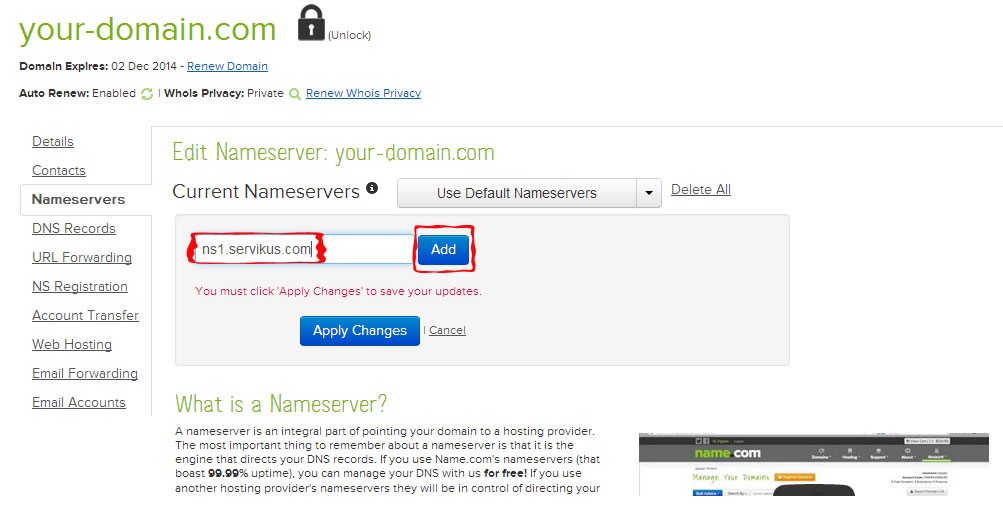
- On the Edit Name Servers page you will see the nameserver values you have currently configured. Select Delete All to remove the current values.

- Copy and paste your nameserver value into the field at the bottom and click Add Name Server. Do this step for all nameservers.
- Once you have added all of your name servers, click the Apply Changes button.
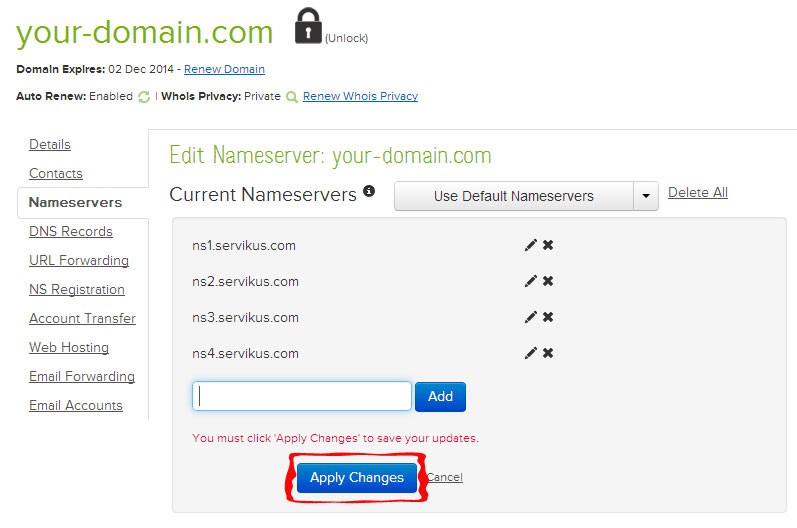
So, you should enter:
- NS1.SERVIKUS.COM
- NS2.SERVIKUS.COM
- NS3.SERVIKUS.COM
- NS4.SERVIKUS.COM
Then, allow 24-48 hours for your nameserver changes to propagate. During that period your website may work in some locations and not in others. If you are not willing to wait you can always change etc/hosts file.

============================================================================